Before You Begin
To download .zip files on your mobile phone, you WILL need to have a .Zip extractor application installed!
I tested this with an app called “Zip Extractor”, but it should work with most .Zip apps!
It might work without this application on an Android phone but iPhone users must use an .zip extractor application like the one below.
You will also need the latest version of the Lightroom CC mobile app as this is the editing software the presets are compatible with. Please download these apps before you begin.

Step 1: Download Link
Once you purchase the presets your preset download link will be available in 2 places.
The first location you can see them is on the CHECKOUT page after your order has been processed just like the image below.

The second location you will find the download link is via the ‘YOUR ORDER IS COMPLETE’ email that you registered when you purchased the product.
NOTE: The email might end up in your SPAM FOLDER so make sure you check it if you can’t find the purchase email.

Step 2: Transferring Presets to Mobile Device
NOTE: If you are on a computer you should have no issue downloading and installing the mobile presets to your phone and computer. If you would like to know how to install them for your computer click this link.
To download the mobile presets to your PHONE you need to click the download link (in step one) and this should take you to a website with the purchased product files. You want to look for the .zip file and click on it!

Once you click on it you will have the option to DOWNLOAD the files to your device, click DOWNLOAD! This may take a few moments depending on how fast your internet is so please be patient while the file downloads.

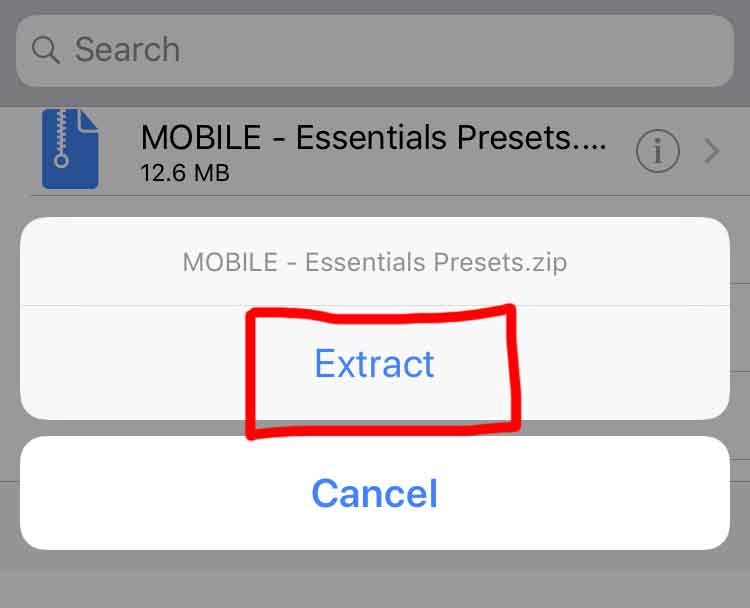
If you have downloaded the .ZIP EXTRACTOR application it should automatically pop up with the suggestion to “Open in Zip Extractor” – if it suggests another application click “more…” and choose the correct zip application.
Open the files in the Zip Extractor!

Step 3: Saving Photos to Mobile’s Camera Roll
Once you have opened the files in the Zip Extractor software you need to click the ZIP and EXTRACT the FILES from the zip folder. To do this just click on the .zip file within the application.
Once this is complete you will be able to go into the unzipped folder to find the .dng files for Lightroom CC.
This next part can be slightly fiddly but you only have to do it once.
You have to click on the ‘i’ icon and click ‘open in’! Once you have done that click “SAVE IMAGE”. Repeat this process with every single DNG file you have within the folder. You should have 9 files in each folder unless its the essentials package which contains 3.


We are almost finished! Now you should see all the .DNG files in your camera roll – they will be greyed out boxes like the photo example below.

Step 4: Importing Photos to Lightroom CC
This next step is very simple. Open up the free mobile app called Lightroom CC and create a new album by clicking the ‘+’ sign. Name the album something easy to understand like Jorden Presets and click save.
Next we go into the album and click the add photos button in the bottom right hand corner. Select all the .DNG files from the camera roll and add them to the folder. This might take a few moments but you should see my photos in your Lightroom album!


Step 5: Creating the Preset!!!
The final step of the process is to create the preset so it is easy for you to access 🙂
All you have to do is go into one of my photos you jump imported, click in the top corner with the three dots ‘…’ and click “create preset”.
Name the preset after the text in the photo itself so you don’t get confused and save to “user presets”.
Repeat this process for all the presets you have purchased and BOOM. You can now edit your photos with one or two quick clicks like that!
If you cant find the preset setting it is in the FAR RIGHT corner of the edit menu so scroll across to the end to see them then apply the desired look.
With my presets to get a nice looking photo you might need to adjust the exposure or the white balance (blue or yellow) depending on what kind of photo you are editing. Remember to tag me @jordentually in your photos so I can critique and give advice along with look at all your awesome creations!!!


If you have any more questions send an email to Jorden@jordentually.com and I will get back to you when I can. Thank you for all the support and remember there are some amazing youtube videos to assist you as well 😉
whatheck!
Jorden